How to Prepare Yourself for Multiple Nights on a Winter Trail
- March 19, 2025
- joshenns003@gmail.com
- 3:11 am
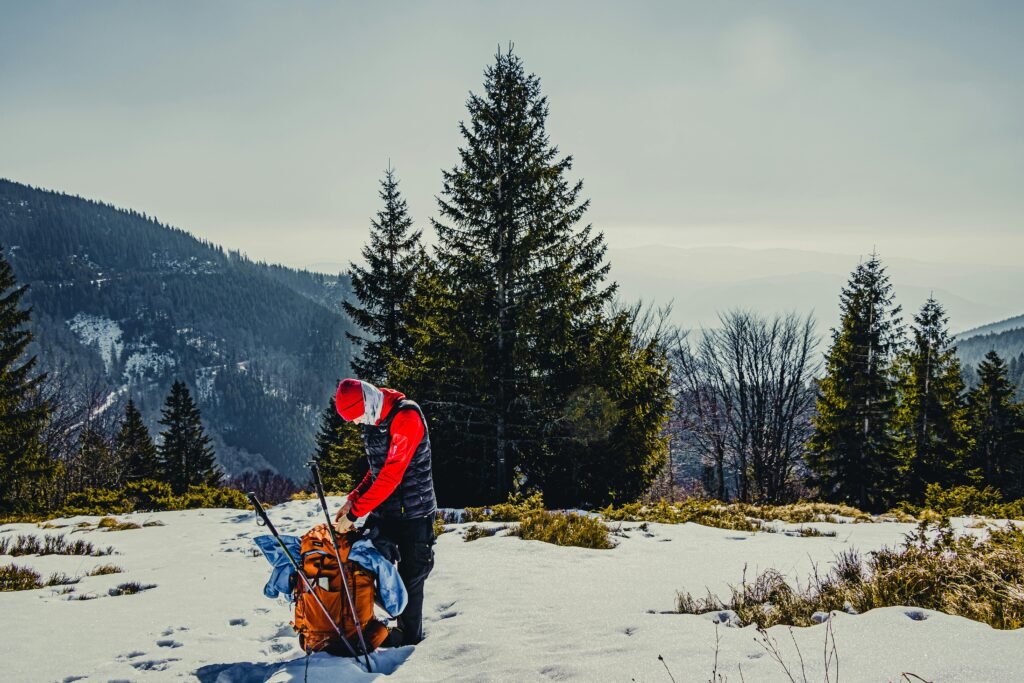
Imagine hiking through thick snow, your fingers numb, your feet frozen, and your stomach desperately growling. You didn’t plan for this, and suddenly, all you can think about is that cozy bed back home. That warmth feels like a distant, impossible dream as you trudge through snowdrifts, wondering how you ended up here. Not planning properly for a winter hike turns a peaceful adventure into a frantic race to find shelter and warmth—fast!
How to Prepare Properly for a Multiple-Day Winter Hike
Preparing for a multiple-day winter hike is a daunting but rewarding task. The cold weather, long days, and the need for safety and comfort require careful preparation. This article covers the crucial steps for a successful winter hike, divided into three main sections: planning your route, packing essentials, and staying safe. Each section includes practical tips that will help you plan ahead, pack efficiently, and stay safe during your winter adventure.
Section 1: Planning Your Route
Planning your route is one of the most important steps in preparing for a multiple-day winter hike. In winter, trails can be harder to navigate, and the weather can change rapidly. Proper planning not only helps you stay on track but also ensures that you know what to expect along the way. Researching your route, understanding the terrain, and having backup plans in case of emergencies are essential to staying safe and on course. Additionally, having a contingency plan allows you to react quickly if you encounter unforeseen obstacles like extreme weather conditions.
1. Researching Trails
Planning your route is crucial, and one of the first steps in making sure your multiple-day winter hike is successful. Winter hiking conditions can drastically alter trail conditions, so proper research will ensure you’re prepared for any obstacles along the way. Using reliable trail maps, checking reports, and consulting with locals can make a world of difference when navigating snow-packed routes. Whether you’re choosing between various terrains or picking an alternative route in case of bad weather, thorough research allows you to anticipate potential problems. A bit of preparation will help you avoid the danger of losing your way and help ensure a smoother hiking experience. Understanding where the trail leads, and how difficult it might be in winter, should be your first step. Combining multiple sources of information can prepare you for whatever nature has in store during your hike.
Tip #1: Use Reliable Mapping Tools
• Online trail maps help you track your route accurately.
• Topo maps show elevation changes to help avoid tough climbs.
• GPS apps allow you to follow the trail even in poor visibility.
Tip #2: Know the Terrain
• Assess the difficulty of the trail before committing to it.
• Check for obstacles like ice, deep snow, or avalanches.
• Research local reports for any trail closures or hazards.
Tip #3: Plan for Alternative Routes
• Have alternate routes in case of closed trails or bad weather.
• Diversify your plans for different terrain types to stay flexible.
• Consult guides who have hiked the route in winter conditions.
2: Understanding Winter Conditions
In winter, conditions can change dramatically within a short period of time. Understanding the weather and how it will impact your hike can be the difference between success and failure. The cold, wind, and snow can increase risk factors significantly, so checking local weather forecasts and knowing what to expect during your hike is vital. In addition to temperature fluctuations, snowstorms, blizzards, and whiteouts are common in many winter hiking areas, making visibility a major concern. Knowing how to adapt to these shifting conditions, from adjusting your pace to finding shelter when necessary, is crucial. Staying informed on the daily weather and being able to recognize dangerous patterns early can help you make critical decisions, like whether to continue or turn back. Proper planning here ensures that your route remains viable, even if the forecast turns.
Tip #1: Check Weather Forecasts
• Weather apps provide detailed forecasts specific to hiking areas.
• Hourly updates give insight into temperature drops and storm fronts.
• Pay attention to the wind chill factor, which can cause frostbite.
Tip #2: Prepare for Shorter Daylight
• Plan hikes with early starts to make the most of daylight.
• Carry headlamps in case you’re caught out past sunset.
• Use reflective gear to increase visibility during short days.
Tip #3: Monitor Snow and Ice Conditions
• Snow accumulation can hide trails or create dangerous ice layers.
• Track avalanche risks by checking reports from local authorities.
• Expect slippery sections and plan accordingly for traction.
3: Estimating Hiking Time
Understanding how long it will take you to complete your multiple-day winter hike is essential. Snow-covered trails, shorter days, and heavy gear can all slow down your pace. When estimating your time, be realistic about the challenges posed by winter conditions. The presence of snow or ice on the trail can increase walking difficulty, causing your hike to take longer than expected. Fatigue from the cold also tends to set in earlier, meaning you should factor in rest breaks more frequently. Additionally, daylight hours are significantly shorter during the winter months, meaning you should start early and aim to reach camp before dark. Estimating your hiking time also requires planning for emergency situations that could add delays. Being conservative with your time estimations ensures you’re not pushing too hard or risking exposure to the elements after dark.
Tip #1: Consider Trail Difficulty
• Challenging trails may take longer to navigate in winter.
• Time estimates should include breaks and weather delays.
• Plan for slower pace due to heavy snow and ice.
Tip #2: Account for Fatigue
• Winter hiking drains more energy due to the cold and snow.
• Monitor your energy and schedule extra rest stops along the way.
• Keep track of time to ensure you don’t overextend yourself.
Tip #3: Have a Realistic Plan
• Avoid overly ambitious hikes in harsh winter conditions.
• Adjust your route if conditions worsen during the hike.
• Give yourself extra time for unexpected delays or detours.
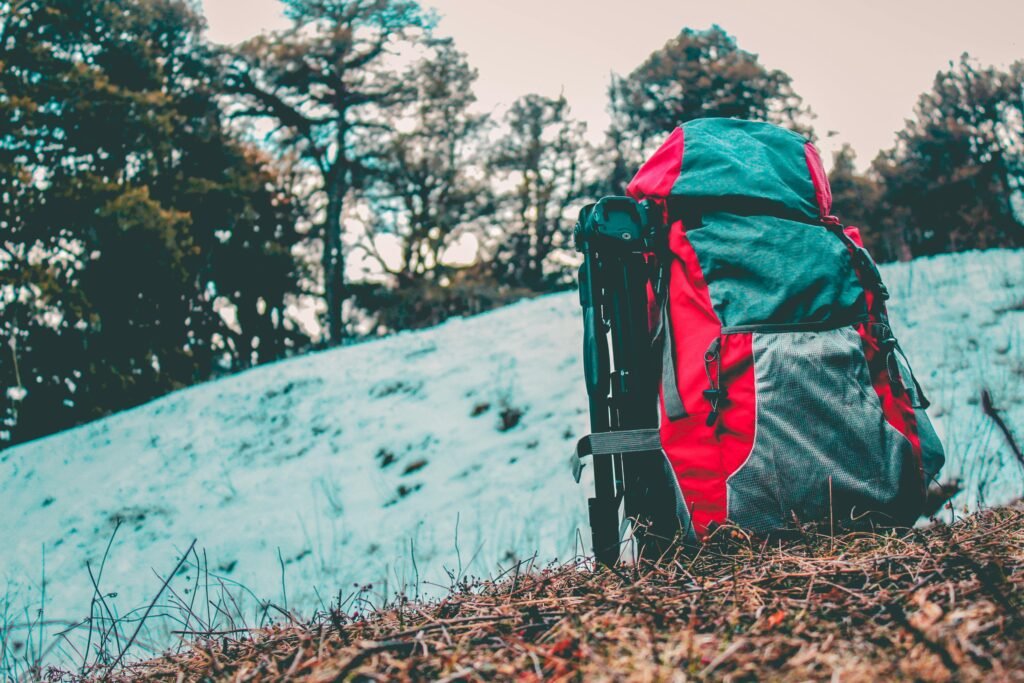
Step 2: Packing Essentials for a Winter Hike
Packing the right gear for a multiple-day winter hike is crucial for staying safe, warm, and comfortable. In winter, the cold, wet conditions make it essential to pack the right clothing, shelter, and equipment. Efficient packing not only helps you maintain comfort, but it also ensures you’re prepared for emergencies. You’ll need to carry a balanced mix of lightweight and durable gear to avoid overpacking, while still having everything you need for the cold, rugged conditions.
1. Clothing and Layers
Choosing the right clothing for a winter hike is about more than just warmth. Layering allows you to manage your body temperature effectively by adapting to changing conditions as you hike. In cold weather, it’s essential to wear moisture-wicking base layers that keep sweat off your skin, which can lead to chills and discomfort. On top of that, adding mid-layers, such as fleece or down, can provide insulation, helping to trap body heat. Insulated outer layers like waterproof jackets and pants are crucial for blocking the wind and snow. Gaiters help keep snow out of your boots, and wearing thick wool socks ensures your feet stay dry and warm. It’s important to bring extra clothing, as wet clothes in winter can quickly lead to hypothermia. The key is wearing layers that are flexible and allow you to regulate your body temperature while staying protected against the cold.
Tip #1: Invest in Moisture-Wicking Layers
• Base layers made from wool or synthetic fabric keep sweat away.
• Thermal underwear provides insulation while remaining breathable.
• Avoid cotton as it traps moisture and increases the risk of hypothermia.
Tip #2: Bring Insulated Outerwear
• Down or synthetic jackets offer excellent insulation in cold conditions.
• Windproof and waterproof shells protect against snow and cold winds.
• Adjust layers based on activity level and temperature fluctuations.
Tip #3: Use Proper Footwear
• Waterproof boots prevent snow and water from soaking your feet.
• Gaiters keep snow out of your boots when trudging through deep snow.
• Warm socks made of merino wool or synthetic fibers help retain warmth.
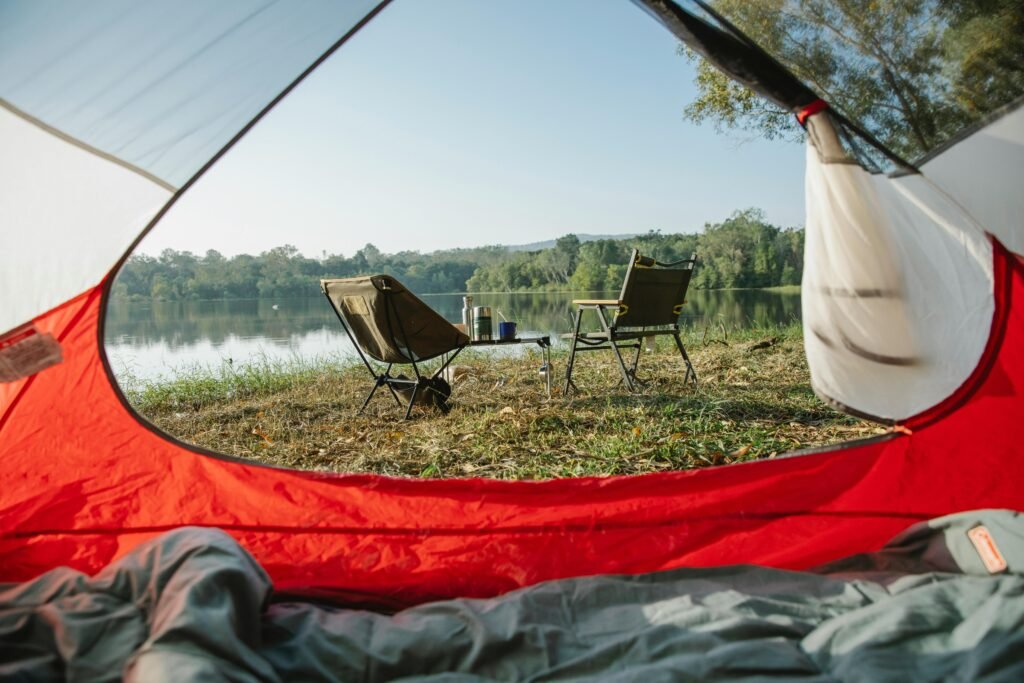
2. Sleeping Gear
When camping out in the cold, ensuring you have the proper sleeping gear is vital for maintaining warmth and comfort. A quality sleeping bag with the appropriate temperature rating is your first line of defense. Look for sleeping bags made from down or synthetic insulation, which provide excellent warmth and are compact for packing. If you’re expecting sub-zero temperatures, make sure your bag can handle extreme cold and that it’s rated for those conditions. Pairing your sleeping bag with an insulated sleeping pad is just as crucial to avoid heat loss to the ground. Closed-cell foam pads are a solid option as they provide excellent insulation and are lightweight. In addition, a four-season tent is a must for winter camping. These tents are designed to handle heavy snow, strong winds, and frigid temperatures, ensuring that you stay safe and dry throughout your hike.
Tip #1: Choose a Winter-Ready Sleeping Bag
• Down-insulated sleeping bags retain heat in freezing conditions.
• Synthetic options perform better when damp from sweat or humidity.
• Check the temperature rating to ensure it suits winter hiking.
Tip #2: Use Insulated Sleeping Pads
• Closed-cell foam pads insulate you from the cold ground.
• Self-inflating pads are compact and provide additional warmth.
• Double up on pads for extra insulation in extreme cold.
Tip #3: Pack a Four-Season Tent
• Sturdy tents resist snow accumulation and wind gusts.
• Sealed seams ensure waterproofing in heavy snow or rain.
• Tensioned poles provide stability in harsh weather conditions.
3. Cooking and Hydration
Maintaining a steady source of warmth and energy on your multiple-day winter hike requires careful consideration of your cooking and hydration needs. Since liquid water can freeze in extreme temperatures, an insulated water bottle or hydration bladder is essential for preventing your drinking water from freezing. You’ll also need a reliable stove capable of working in cold temperatures. Multi-fuel stoves are your best bet in winter, as they can work more effectively than canister stoves in freezing weather. Compact cooking gear like titanium cookware is ideal for lightweight, durable, and efficient meals. Consider dehydrated meals that are easy to prepare and light to carry, but ensure you have a reliable method to boil water. Keeping your stove and fuel protected from the cold is also critical to avoid complications when trying to cook in freezing temperatures. Adequate hydration and nutrition will ensure your body can maintain the energy required to keep up with the demands of a winter hike.
Tip #1: Use a Multi-Fuel Stove
• Liquid fuel stoves work better in cold temperatures than canister stoves.
• Priming the stove before use ensures efficient performance.
• Bring extra fuel as cold conditions can burn through fuel quickly.
Tip #2: Carry Lightweight Cooking Equipment
• Titanium cookware is durable and light, perfect for winter hikes.
• Collapsible pots save space and reduce weight in your pack.
• Non-stick pans make it easier to clean after cooking.
Tip #3: Stay Hydrated with Insulated Bottles
• Insulated water bottles prevent liquids from freezing in cold temperatures.
• Hydration bladders work well in cold weather if protected from freezing.
• Carry warm drinks like tea or coffee to help stay warm.
Step 3: Staying Safe on a Winter Hike
Staying safe during a multiple-day winter hike is a top priority. Winter conditions can quickly turn dangerous, with extreme cold, snowstorms, and reduced visibility posing significant risks. Being well-prepared for emergencies, knowing how to avoid common winter hazards, and being able to assess your own health and safety are essential skills. Following these safety guidelines will help you make it through your hike without incident.
1. Dealing with Extreme Cold
The risks posed by extreme cold are one of the most critical safety concerns during a multiple-day winter hike. When temperatures dip, hypothermia becomes a real danger, especially if you’re wet or exposed to the wind for too long. Recognizing the early signs of hypothermia—shivering, confusion, and fatigue—is key to taking immediate action before things worsen. Keeping your core warm by layering your clothes and keeping your gear dry can help prevent this. If you or a hiking companion begins to show signs of hypothermia, seek shelter immediately and begin the process of warming up slowly. Insulating your body with extra layers, using hand warmers, and taking rest breaks will help maintain your core temperature. Remember to avoid overheating, as excessive sweating in freezing conditions can increase the risk of hypothermia.
Tip #1: Recognize the Signs of Hypothermia
• Shivering and confusion are early indicators of hypothermia.
• Fatigue and slurred speech suggest your body is losing heat.
• Seek shelter immediately and begin warming the person slowly.
Tip #2: Keep Warm with Layers
• Layering provides flexibility to add or remove clothing as needed.
• Insulated hats and gloves help trap body heat effectively.
• Thermal blankets are compact, lightweight, and provide emergency warmth.
Tip #3: Avoid Overheating
• Sweat increases the risk of hypothermia if your layers get wet.
• Ventilate clothing or remove layers when you feel overheated.
• Cool down before continuing your hike to avoid further sweat buildup.
2. Navigating Stormy Weather
Storms can appear suddenly in the winter months, and knowing how to navigate through them is crucial for staying safe on your winter hike. The wind chill factor can make temperatures feel much colder than they actually are, and heavy snow can quickly obscure trails. Tracking weather patterns and knowing when to seek shelter is important for your survival. Having an emergency shelter or tarp to set up quickly can provide necessary protection if a storm catches you off guard. Stay aware of storm predictions, and don’t hesitate to alter your plans if the weather worsens. Carrying extra gear like a whistle and signal mirror will allow you to communicate if you need help. If you find yourself lost or caught in a storm, always stay put in a sheltered spot, and wait for conditions to improve.
Tip #1: Monitor Weather Updates
• Weather apps and radios provide real-time forecasts.
• Wind chill warnings can significantly lower the risk of frostbite.
• Severe storms require you to halt your hike and find shelter.
Tip #2: Build Emergency Shelters
• Emergency shelters like bivvies or tarps can protect against snow.
• Use snow caves for protection when in deep snow.
• Stay dry to reduce the risk of frostbite and hypothermia.
Tip #3: Use Proper Signaling Techniques
• Bright-colored clothing increases your visibility in low light.
• Whistles and signal mirrors are effective ways to alert rescuers.
• Stay put if lost to avoid wandering further into the storm.
3. First Aid and Emergency Plans
Knowing how to handle emergencies is essential on a multiple-day winter hike. Carrying a first aid kit is a non-negotiable necessity, and it should include items that address the specific challenges of winter hiking. Cold weather-specific gear like hand warmers, pain relievers for frostbite, and splints for injuries will ensure you’re prepared for most situations. Knowing how to assess the severity of injuries and treat frostbite, hypothermia, and sprains could be lifesaving. It’s also crucial to have a clear emergency plan, including a way to signal for help, such as a beacon, whistle, or mirror. Let someone know your expected route and timeline before you leave, and check in if possible. Practicing self-rescue techniques and staying calm during an emergency are essential for making it through any crisis safely.
Tip #1: Carry a First Aid Kit
• Basic medical supplies like bandages and antiseptic are essential.
• Cold-weather items like hand warmers help with frostbite treatment.
• A splint can help immobilize an injury until help arrives.
Tip #2: Practice Self-Rescue Techniques
• Learn first aid for frostbite, hypothermia, and minor injuries.
• Know how to make a splint from sticks or trekking poles.
• Carry emergency shelters in case you need to rest for extended periods.
Tip #3: Plan for Emergencies
• Know your route and share it with someone before you leave.
• Emergency beacons allow you to signal for help if needed.
• Stay calm and focus on your safety during emergencies.
Bonus Section: What Makes a Good Hiking Pole for Exploring

The Best drones under $300: Budget But Quality
When choosing a hiking pole for your winter adventure, durability and functionality are key. Look for poles with adjustable lengths to adapt to different terrain. Shock-absorbing features reduce strain on your joints during longer hikes. Rubber grips are a must for better traction, especially in wet conditions, and snow baskets prevent sinking into deep snow. A lightweight design helps reduce fatigue while offering stability on icy trails.
Final Thoughts: Don’t Leave Unprepared For Your Adventure
Successfully preparing for a multiple-day winter hike involves a combination of thoughtful planning, the right gear, and an awareness of the dangers posed by the cold, unpredictable weather. By researching your route and understanding the challenges of winter terrain, you can make well-informed decisions that keep you on track. Packing the right clothing, sleeping gear, and cooking equipment is crucial for maintaining warmth, comfort, and safety throughout your hike. Finally, always prioritize your safety by knowing how to respond to extreme cold, navigating stormy weather, and handling emergencies effectively. Winter hiking can be an incredibly rewarding experience, offering stunning landscapes and solitude. But the key to success lies in preparation. Embrace the adventure, but always remember that planning ahead and staying vigilant are the best ways to ensure a safe, enjoyable journey. Your winter hiking experience will be all the more satisfying when you’re well-prepared and equipped for the challenges ahead.